Because sometimes the faster the better: 30 sec headband up do! – Chignon-bandeau

(en français plus bas)

When you are having a bad hair day, just stop having a bad hair day and be awesomely cute instead!

Headband up do is definitely the best hairstyle to turn suspiciously-looking hair into the most stylish up do. Bad hair days are over!

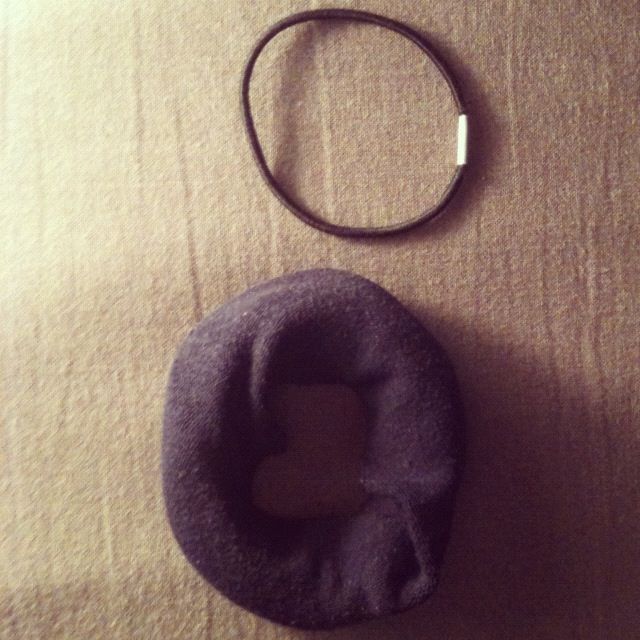
All you need is an elastic headband and 2 hands. Maybe you can manage with just one but as I’m lucky enough to have two I didn’t try! It’s so damn easy that you don’t even need a mirror (you can still use one to admire how indecently cute it is).

Bonus: it fits any situation & makes you look incredible from a beach barbecue to a summer wedding! Now you know that the minuscule free space left in your overcrowded tote was meant to fit a headband!

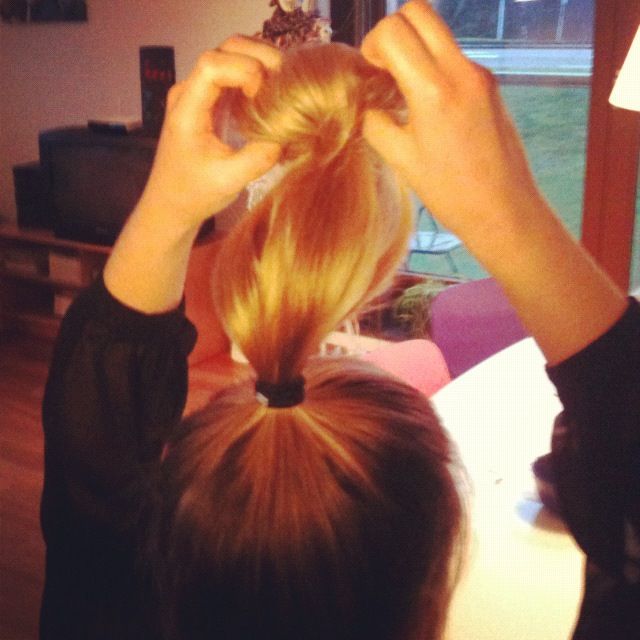
Step 1: Place the elastic headband on the top of your head (with the front of the headband about 3cm away from your forehead) – Mine is from H&M!

NB #1: It might create some volume at the top of your crown… which is okay… we love volume!

NB #2: If you have very thin hair, it might be smart to prep it by adding some texture or to use second-day hair.

Hippie style!

Hippie style!

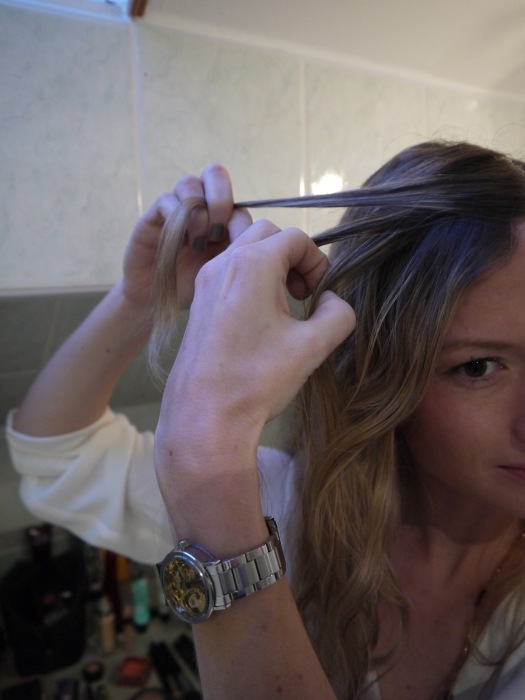
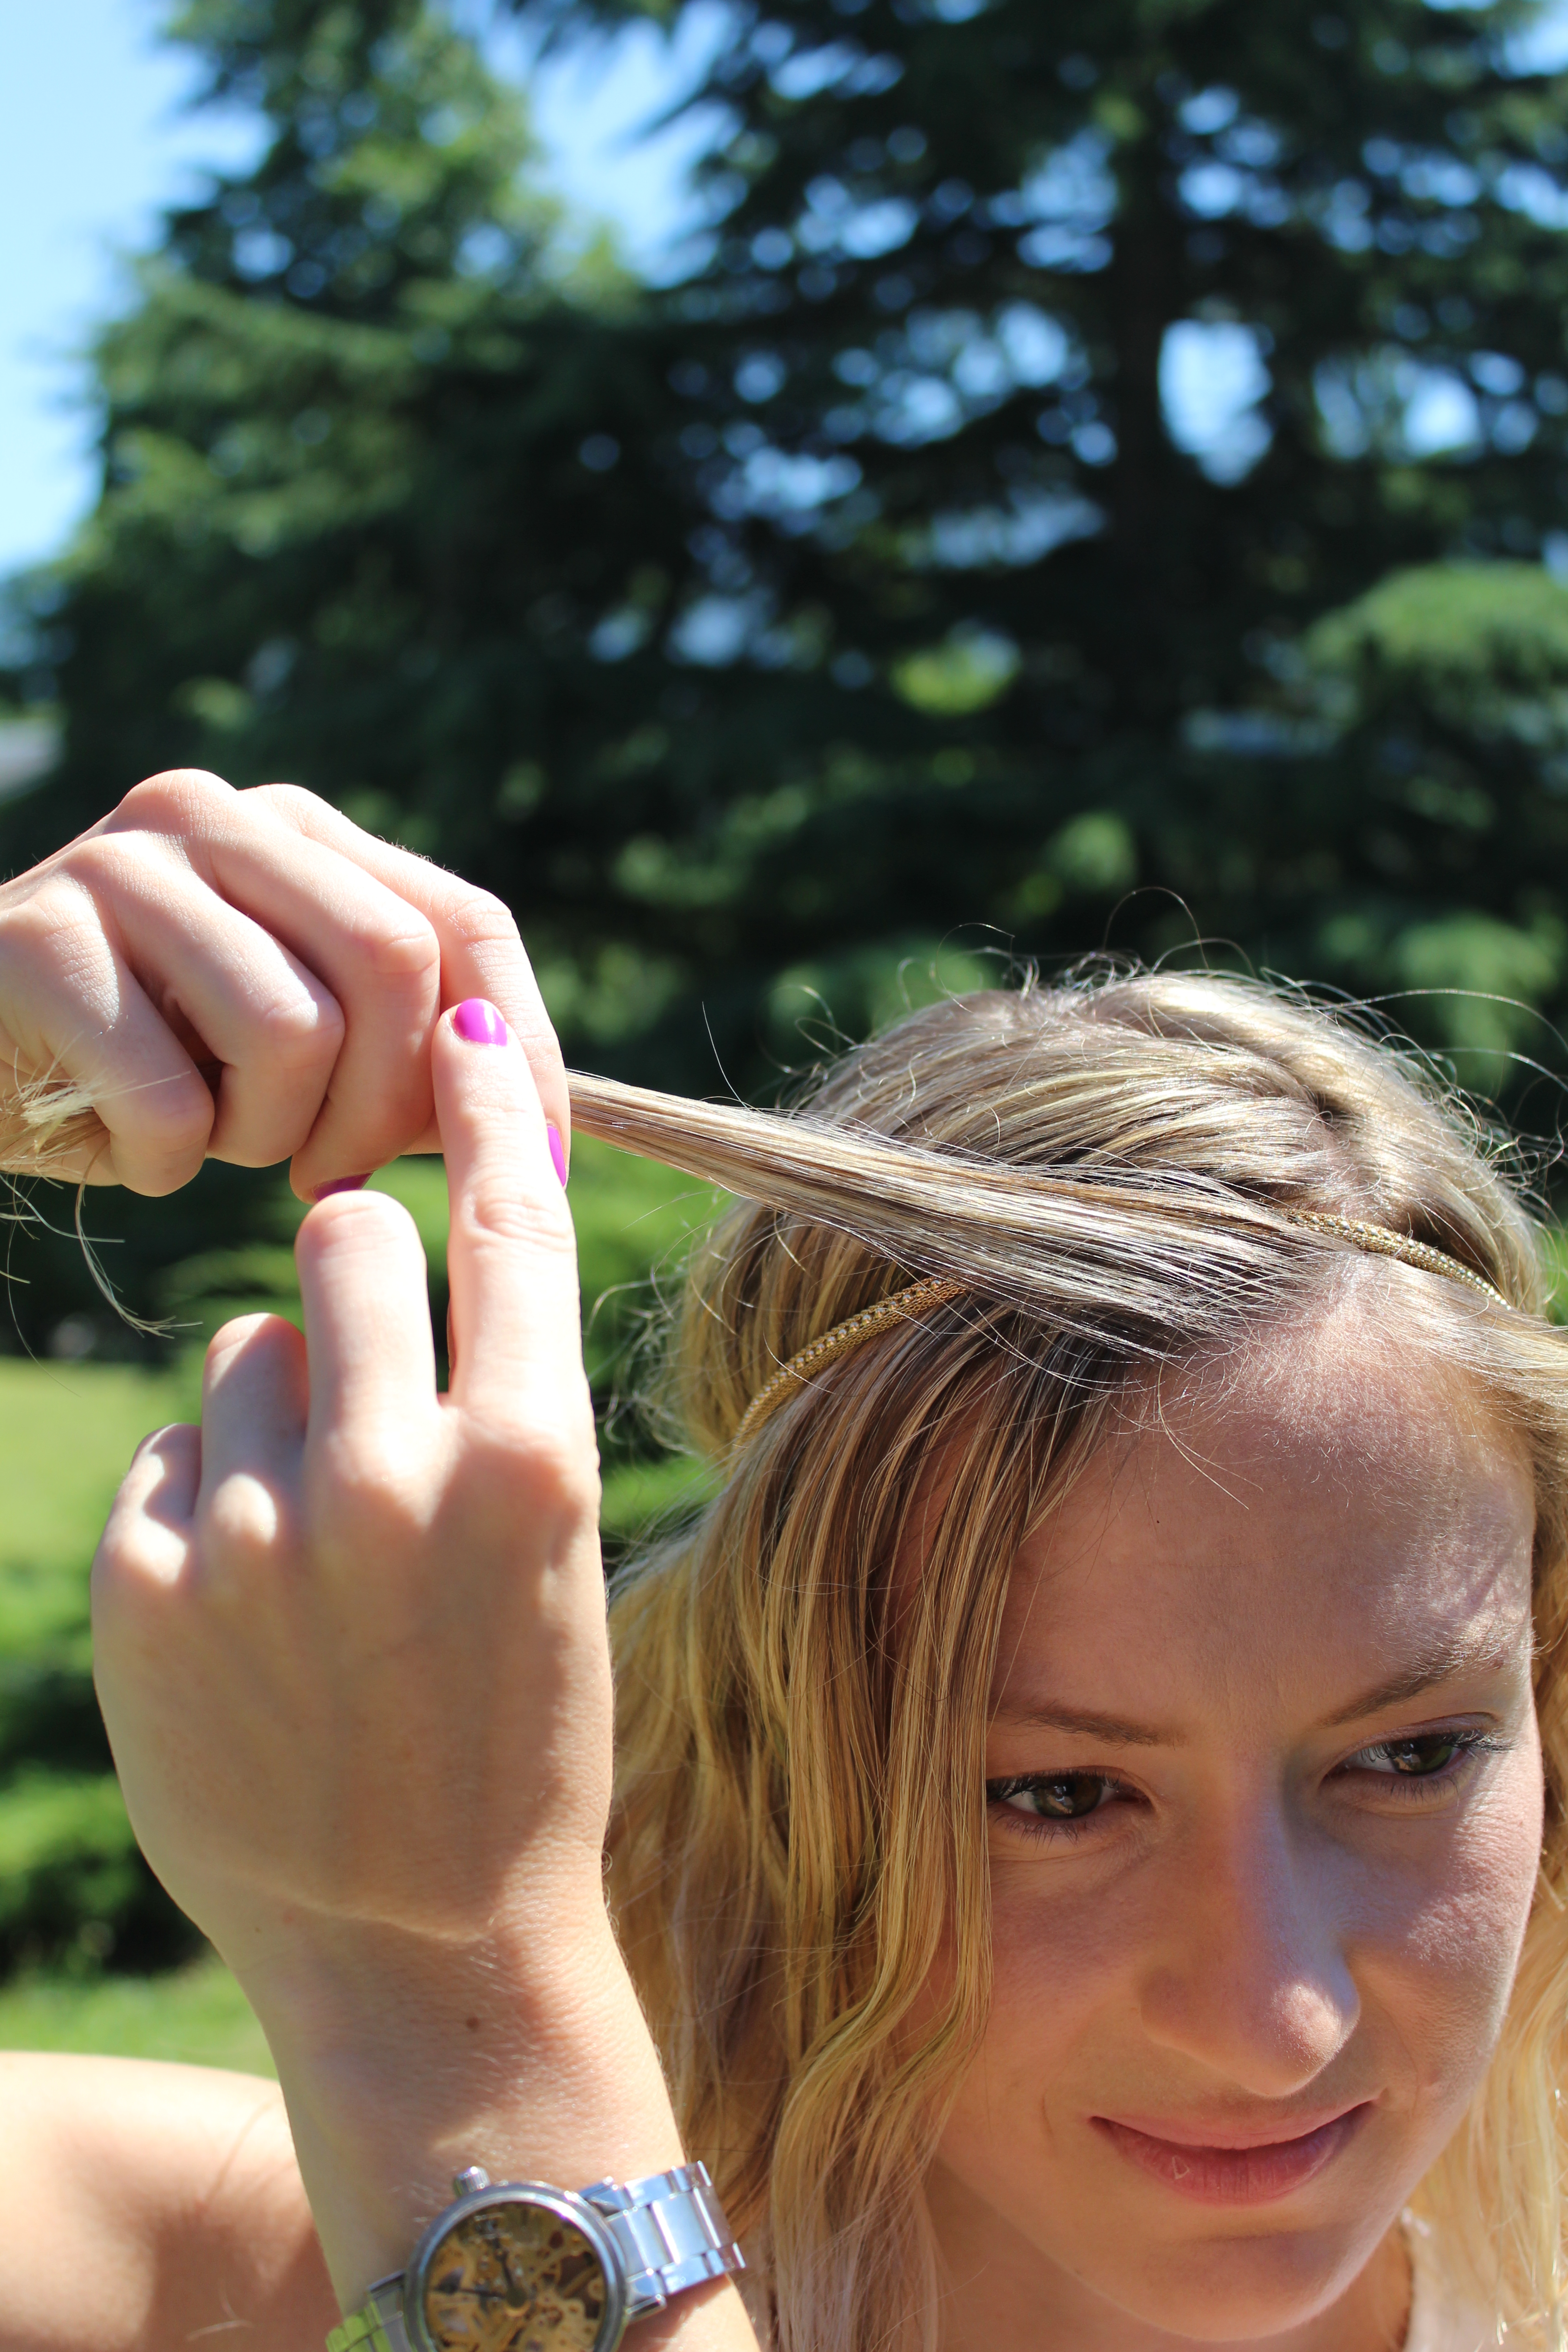
Step 2: Grab a tiny section of hair from the front.

...

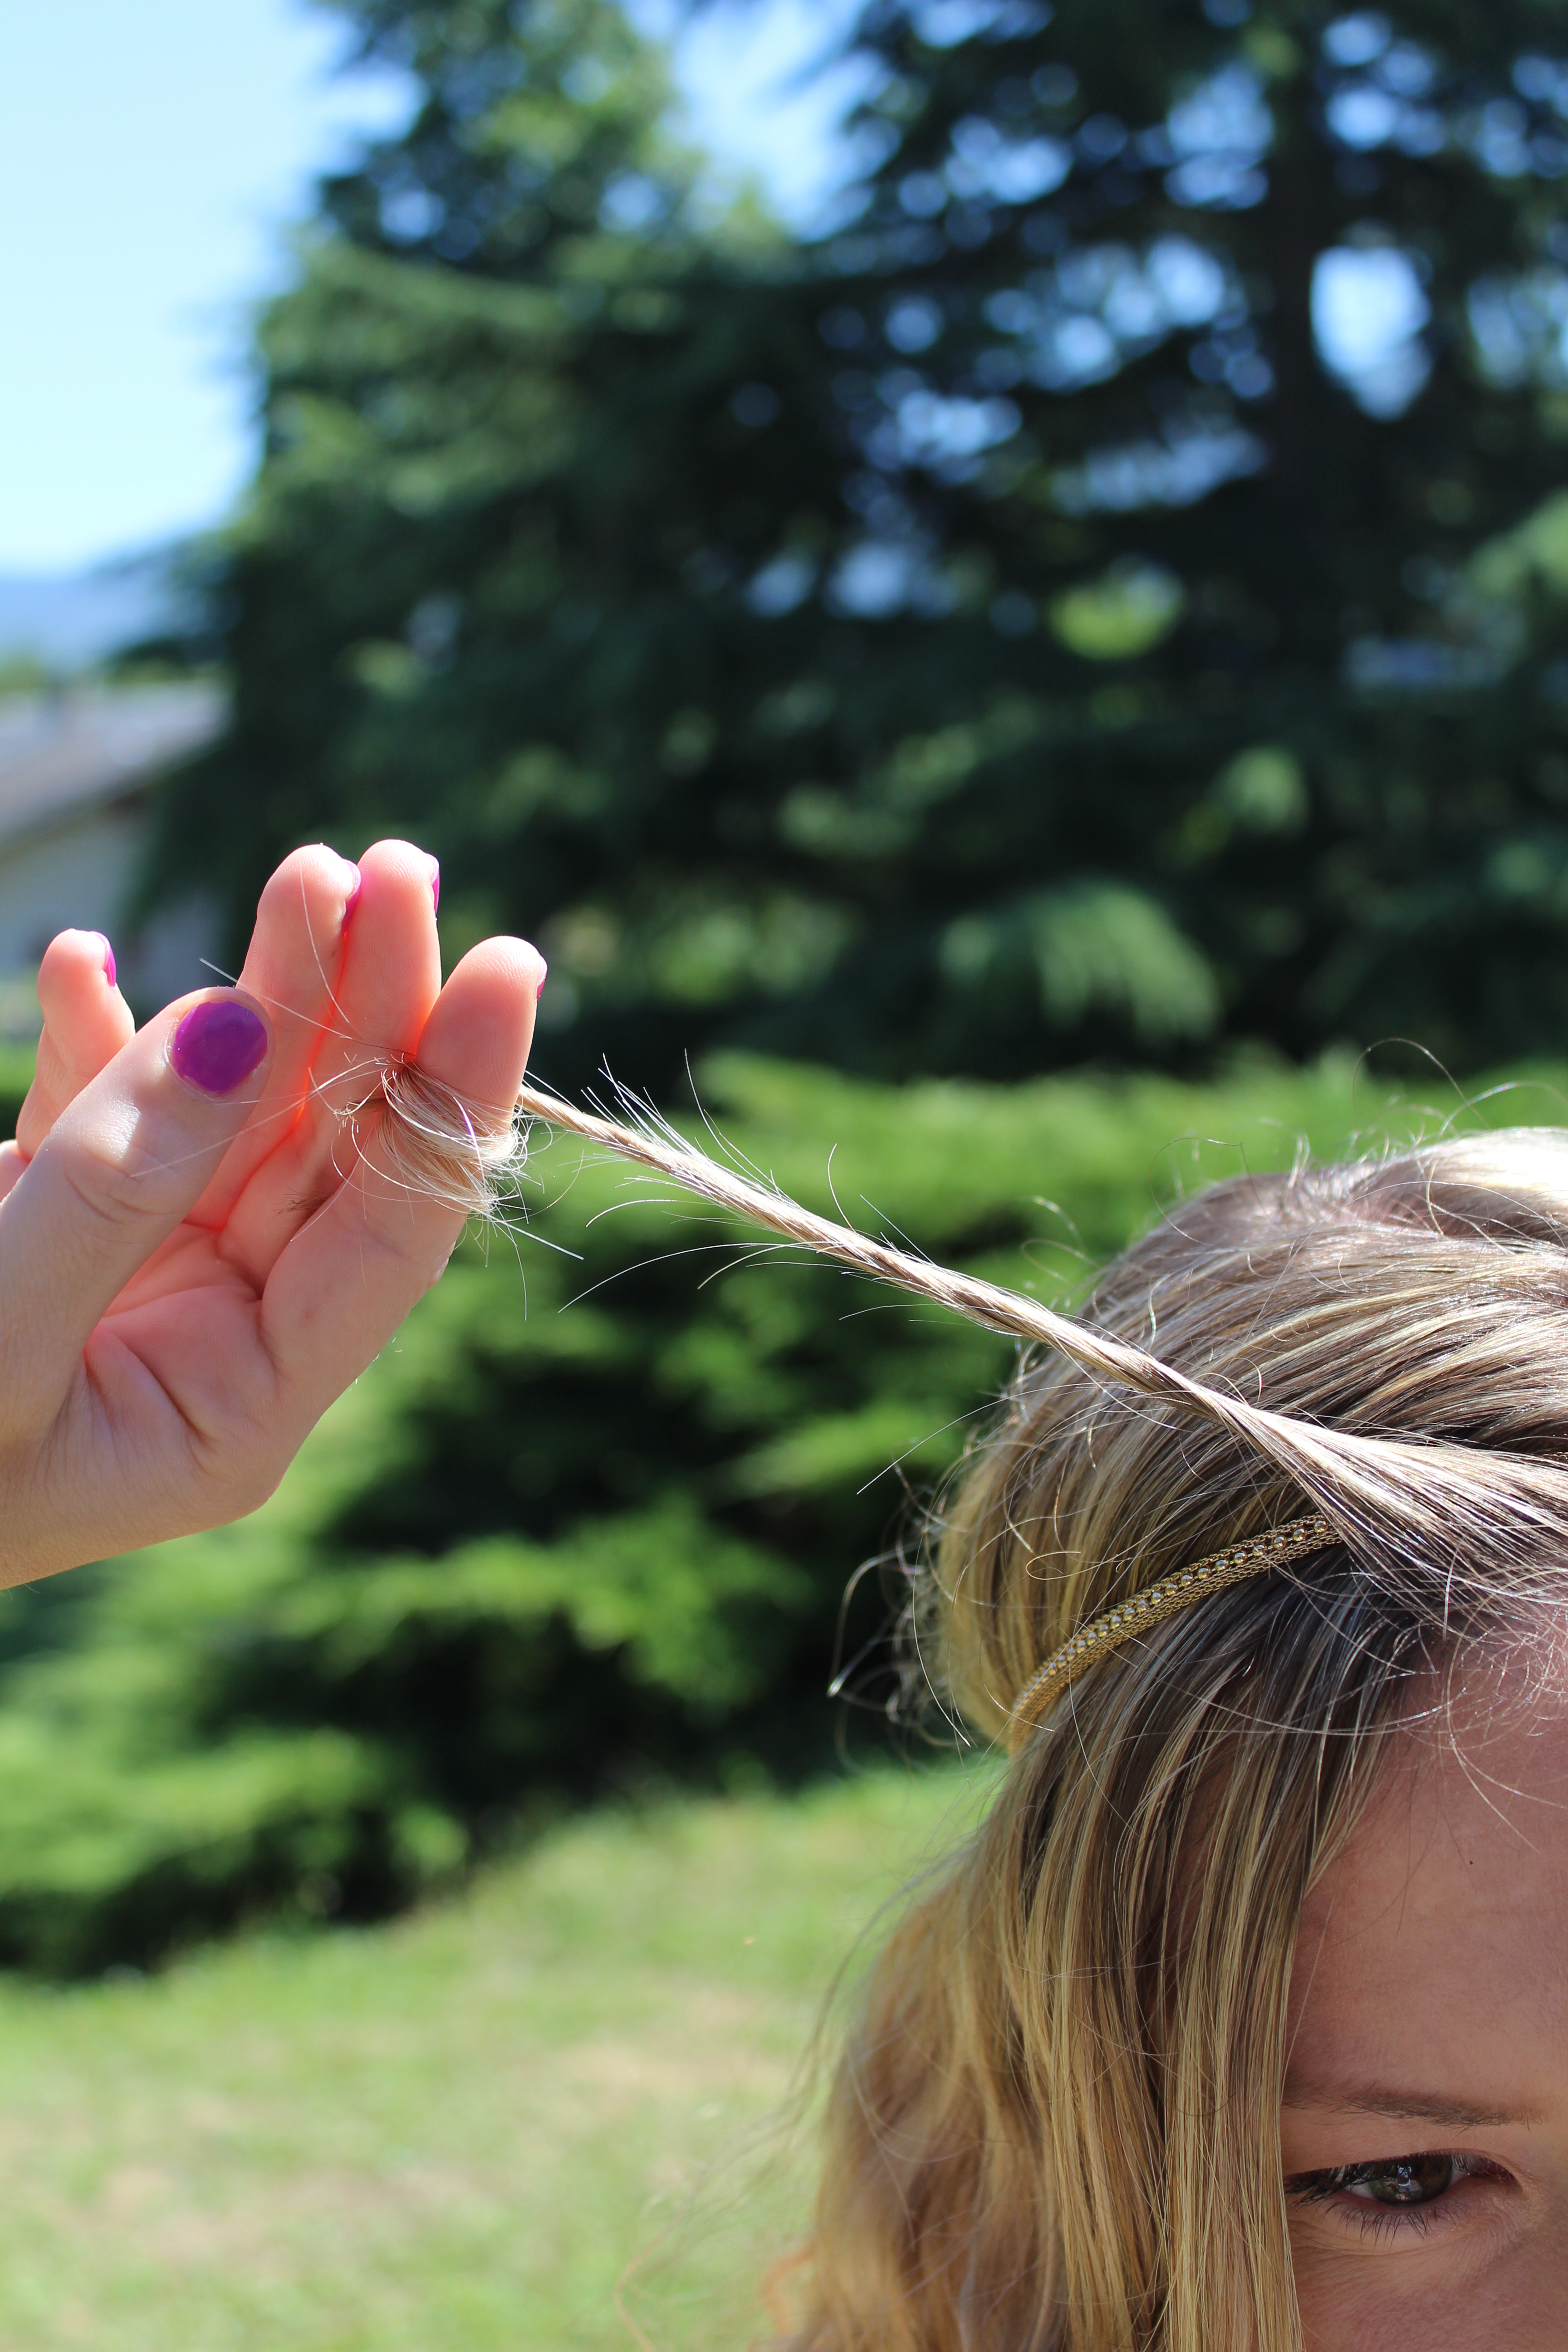
Step 3: Twist it a little.

...

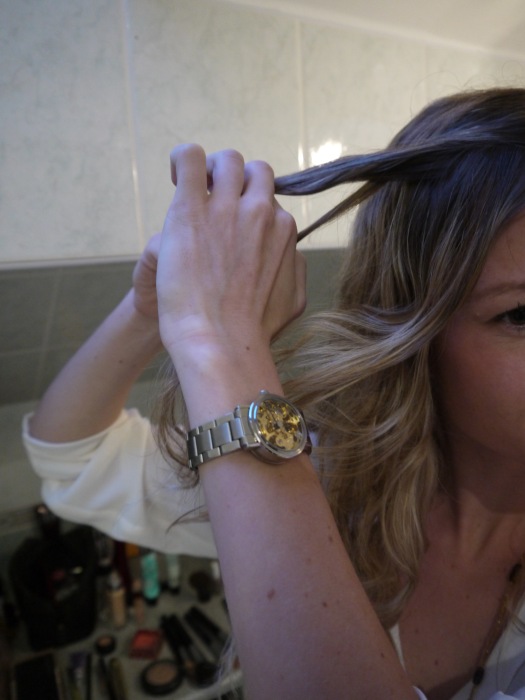
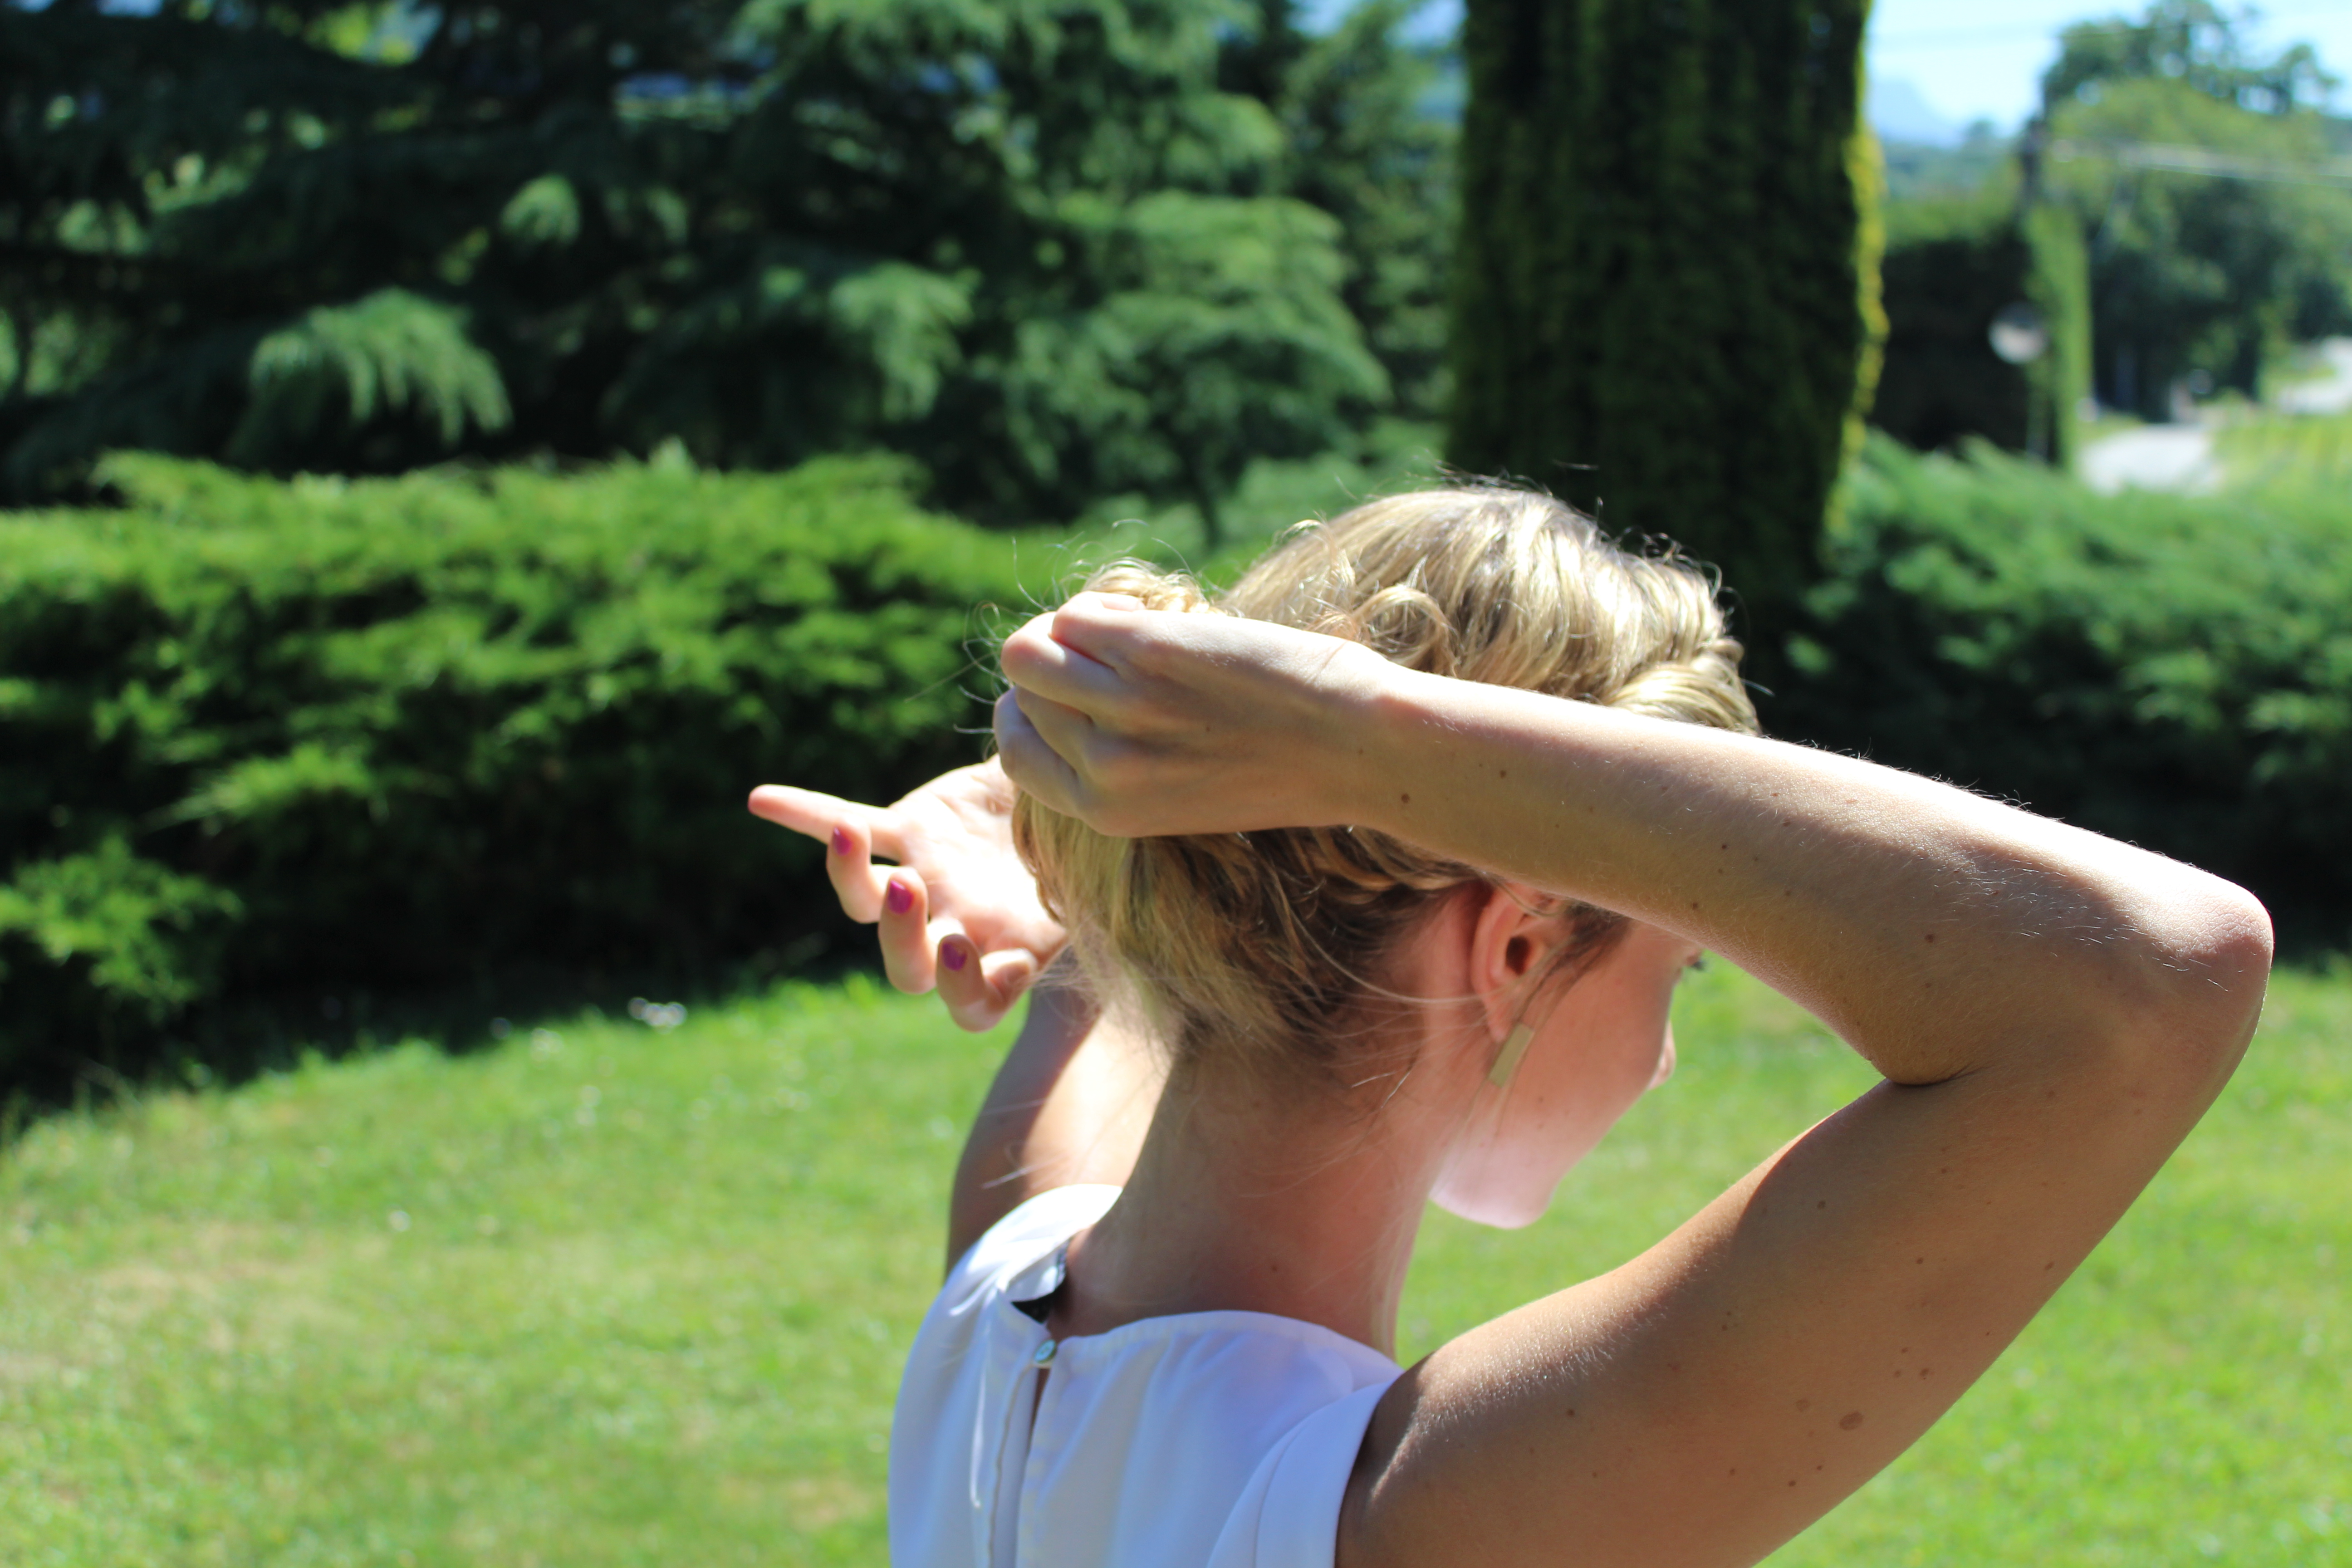
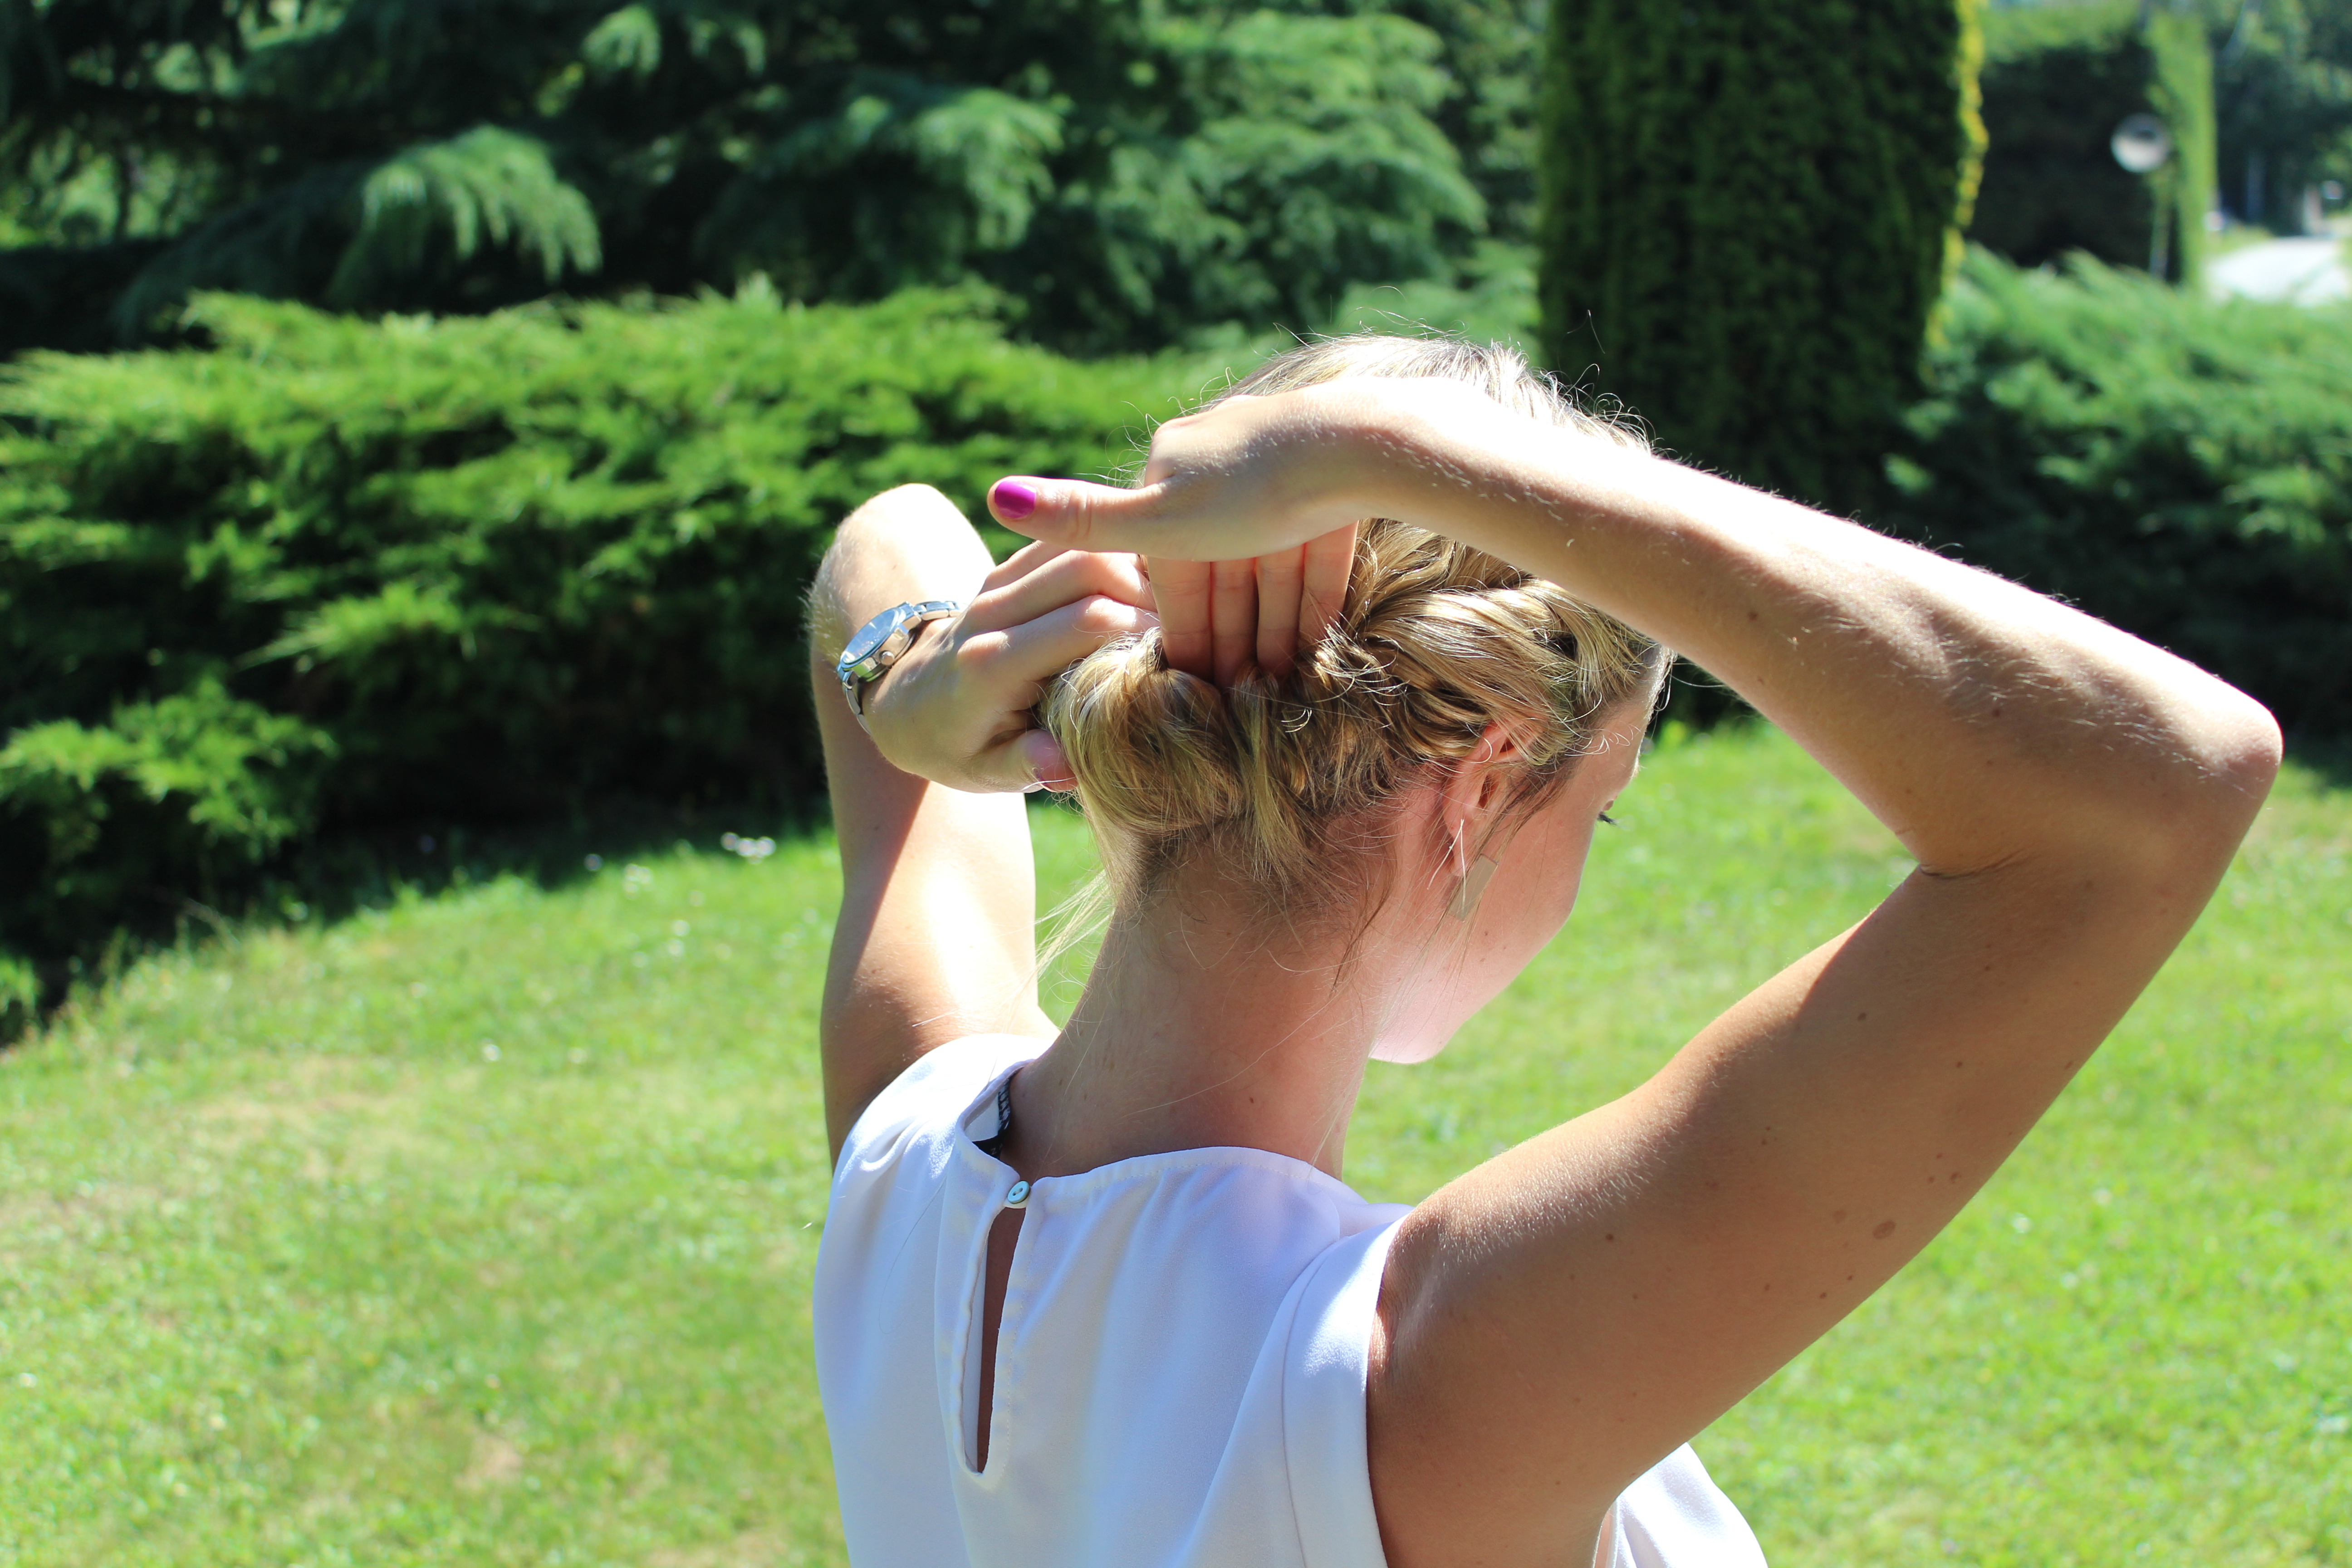
Step 4: Loop the strand of hair around the elastic band and tuck the hair into the band.

Loop...

Loop…

... and tuck in!

… and tuck in!

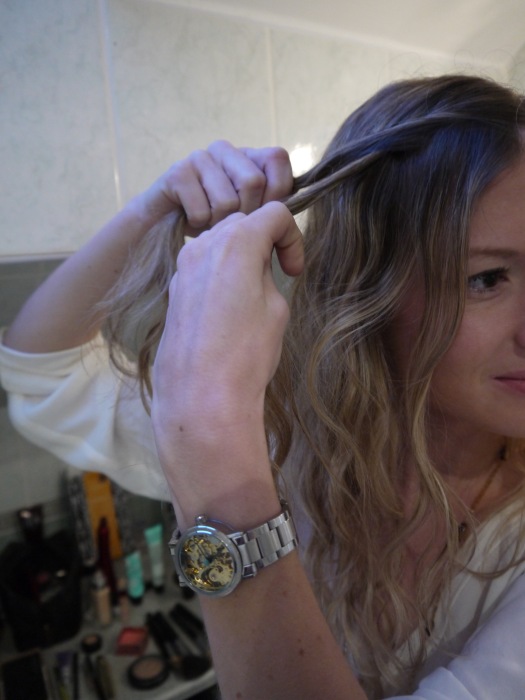
Step 5: Grab another section of hair from the front (now the front is a bit more back if that makes any sense!) and repeat steps 2 to 4 until you reach the back, on each side.

Just keep going...

...again & again...

Don't forget the other side or you'll look stupid at the end!!

Don’t forget the other side or you’ll look stupid at the end!!

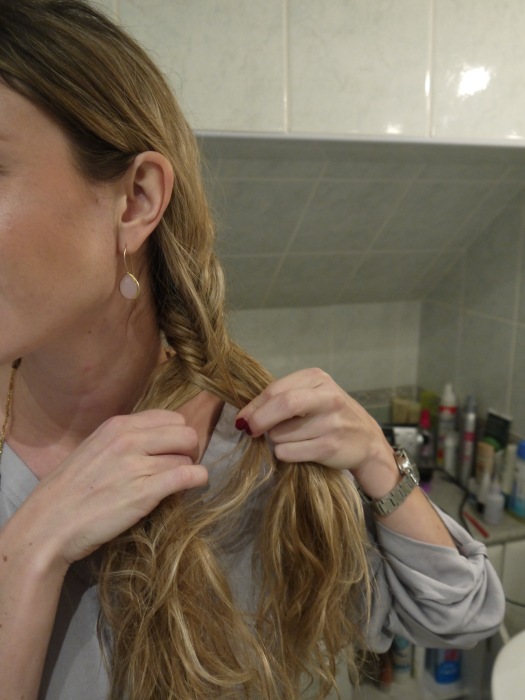
Step 6: Roll what’s left of your hair and tuck the roll into the headband!

Your head posture Aude Pollet!!!!!!!!

Your head posture Aude Pollet!!!!!!!!

...

...

NB #3: Pull some hair out to avoid looking over-polished!

SO not over-polished anymore!! ;)

SO not over-polished anymore!! 😉

Step 7: Find a way to get invited this beach barbecue or summer wedding we were talking about!

Finish look from the front...

Finish look from the front…

Finish look from the side...

…from the side…

... and from the back on our pacs day!

… and from the back on our pacs day! (dunno how to resize pics!!)

**********************************************************************************

Quand vous avez une mauvais journée capillaire, arrêtez juste d’avoir une mauvaise journée capillaire et soyez fantastique !

Le chignon-bandeau est certainement la meilleure coiffure pour transformer une chevelure suspicieusement mal coiffée en un chignon super élégant. Bad hair days are over!

Vous avez seulement besoin d’un bandeau et de 2 mains. Peut-être que ça marche avec une seule mais comme j’ai la chance d’en avoir deux je n’ai pas essayé ! C’est tellement facile que vous n’avez même pas besoin de miroir (mais vous avez quand même le droit d’y jeter un œil pour admirer l’œuvre !).

Bonus: cette coiffure est adaptée à n’importe quelle situation & vous donne une allure incroyable à un barbecue au lac comme à un mariage estival ! Maintenant vous savez que le minuscule espace libre dans votre sac à main déjà plein à craquer était destiné à accueillir un bandeau !

Étape 1: Placez le bandeau élastique sur le sommet de votre tête (en laissant environ 3 cm entre le front et le bandeau) – Le mien vient d’H&M.

NB #1: Il se peut que cette étape crée du volume au-dessus du bandeau… ce qui est okay… On aime le volume!

NB #2: Si vous avez les cheveux très fins, c’est peut-être mieux de préparer vos cheveux en ajoutant un peu de texture, ou de réaliser cette coiffure sur des cheveux lavés la veille.

Étape 2: Prenez une mèche de cheveux à l’avant.

Étape 3: Entortillez-là légèrement.

Étape 4: Enroulez la mèche autour du bandeau et rentrez-là sous le bandeau.

Étape 5: Prenez un autre section de cheveux à l’avant (maintenant les cheveux les plus à l’avant sont un petit peu plus à l’arrière… si par chance vous comprenez ce que je veux dire !) et répétez les étapes 2 à 4 jusqu’à ce que vous atteigniez l’arrière, de chaque côté.

Étape 6: Formez un rouleau avec ce qu’il reste de vos cheveux et rentrer le rouleau sous le bandeau !

NB #3: Sortez quelques mèches pour éviter le look super guindé!

Étape 7: Trouvez un moyen d’être invitée à ce barbecue au lac ou à ce mariage estival dont nous parlions !

Angel hair – Cheveux d’ange

(en français plus bas)

We all have terrible hair days once in a while. Sadly for me, I am in one of those bad days almost every day lately! It looks like a battlefield up there, and I don’t have no one to save me from this hair disaster: my hairdresser is in Amsterdam and I am in France for almost a month (I know I’m being stupid and I could go anywhere else, but my hairdresser is a genius who really knows how to handle curly hair, plus they have the most comfy beds for the shampoos (YES beds!!)… and a long long scalp massage… and subdued lighting… and free wine! Definitely a place to try out if you live in Holland or Belgium; I can’t thank Devan enough for the recommendation – It is called Salon B – link here).

Anyway!!! The point is terrible haircut aren’t a fatality, they just force me to find new ways to style my hair. Here is one really fast way to do the trick!

Step 1: Let’s start with the twist on the right side of your hair. Take 2 strands of hair (about 1 cm of diameter) close to the parting of your hair.

angel hair 1

Step 2: Take the stand the closest form your face and pull it over the second strand (the second strand thus becomes the closest from your face).

angel hair 2

Step 3: Incorporate a tiny stand of hair into the second strand (so the closest from your face). Take it and pull it over the first strand.

angel hair 3

angel hair 4

angel hair 5

Step 4: Repeat steps 2 and 3 four to five times; then twist your 2 strands until you reach the back of your skull. Fix it with a bobby pin.

angel hair 6

angel hair 7

angel hair 8

angel hair 9

Step 5: Repeat the same procedure on the left side of your head.

Step 6: Remove the bobby pin from the right side, and make a ponytail with both twists. (You can then cover the hair tie with a tiny strand of hair rolled around it and secured with a bobby pin!)

angel hair 10

angel hair 11

angel hair 12

 Step 7: Et voilà!!

angel hair 13

angel hair 14

**********************************

Nous avons tous des jours ou nos cheveux ne ressemblent à rien. Malheureusement pour moi, ces mauvais jours sont à peu près tous les jours dernièrement ! Ca ressemble à un champ de bataille là-haut, et je n’ai personne pour me sauver de cette désastreuse coupe : mon coiffeur est à Amsterdam et je suis en France pour presque un mois (Je sais bien que je suis stupide sur ce coup là et que je pourrais aller n’importe où d’autre, mais ma coiffeuse est un gémie qui sait vraiment couper les cheveux bouclés, plus ils ont des lits pour les shampooings (OUI lits !!) tellement confortables… et un massage du cuir chevelu tellement tellement long… et une lumière tamisée… et ils offrent le vin ! Définitivement un salon à essayer si vous habitez en Hollande ou Belgique ; merci infiniment à Devan pour le tuyau – Ça s’appelle salon B – lien ici).

Bref !!! Venons-en au fait : les coupes de cheveux défraichies ne sont pas une fatalité, elles me forcent juste à trouver de nouvelles façons  d’arranger mes cheveux. Voici une manière vraiment rapide de tromper son monde !

Étape 1 : Commençons par faire une torsade sur le coté droit. Prenez 2 mèches de cheveux (d’à peu près 1cm de diamètre) á l’avant du crâne, près de la raie.

Étape 2 : Prenez la mèche la plus proche de votre visage et passez-la au-dessus de la seconde (la deuxième mèche deviens la plus proche de votre visage).

Étape 3 : Incorporer une petite mèche de cheveux dans la deuxième mèche (la plus proche du visage donc), puis passez-la au-dessus de la première mèche.

Étape 4 : Répétez les étapes 2 et 3 quatre ou cinq fois, puis torsadez vos deux mèches jusqu’à atteindre l’arrière de votre crane. Fixer la mèche avec une pince plate.

Étape 5 : Répétez la même procédure avec le côté gauche.

Étape 6 : Retirez la pince plate du côté droit, et attachez les deux torsades en queue de cheval. (Vous pouvez ensuite cacher l’élastique avec une petite mèche de cheveux enroulée autour et fixée avec une pince plate !)

Étape 7 : Et voilà !

Fish(tail braid) for compliments!

For an everyday look, I don’t like spending time on my hair (who would?). I am trying to get ready in a blink to save time for my (prepared with love) morning pancakes. Problem: I also love when my hair reflects my mood & I would just get bored if my hair wouldn’t look a bit different each day. 2012 braid trend allowed me to get inventive and to create damn fast & pretty looks. Go for it!

Fishtail braids are just one of many option, but an incredibly gorgeous one! That would be a shame not to try those easy steps:

Step 1: Spread your hair in two sections of equal size

Step 2: Take a tiny strand of hair from the outside of the first section

P1010841

Step 3: Pull it over the top of the first section, and bring it into the back of the second section

P1010842

Step 4: Repeat the steps with the other section, and alternate sides until you don’t have no more hair to braid (you would have guess!)!

P1010843

P1010844

Step 5: Et voila!

(Miss my gorgeous-hair-model-Lisa!)

(Miss my gorgeous-hair-model-Lisa!)

Tip#1: If you take too big strands of hair, it will almost look like a normal braid, so go for tiny ones!

Tip#2: It won’t be as pretty if you don’t take the strand from the very outside of the section, better say it twice!

Tip#3: If you want a messy look, pull randomly on some stands once the braid is finished and fix it with hairspray! Reveal the Blake Lively in you!

Sock it up!

2012 will be remembered for the fail of the end of the world on December 21st, Emilie’s deliciously romantic wedding, Eugenie’s royalty one… and SOCKBUNS!

While I’m no Barney Stinson, I still manage to get my hair looks incredible in a blink with that trick. I wonder who first had the crazy idea to turn a sock into the fanciest hairstyle, but that is close to genius! Since then, I also learned that you can make wavy curls with stockings, but that’s another (way longer and less genius) story (especially if like me you already have those said wavy curly hairs…duh!).

This is the recipe on how your sock (or your bf’s in my case… could have been romantic if we were not talking about socks) can change your life:

Step 1: Steal a sock to your flatmate, bf, little sister, goldfish, etc.

Step 2: Cut the very end of the sock (at the toes), and roll it in a doughnut.

cut sock

doughnut

Step 3: Tie your hair in a ponytail, place the sock doughnut at the very end of it (with the hair running in the centre of the doughnut), and try to disperse hair evenly around it (don’t put too much effort in it, it will spread evenly when you start rolling).

end pony

Step 4: Simply roll the doughnut on itself down the ponytail until it comes into contact with your skull and… it’s done! You’re good to glow!

mid pony

The end result depends on the nature of your hair. You will obtain a classy-ballerina bun with straight hair like my two damn-pretty-shiny-hair brunette and blondy flatmates, while curly hair will end up in a voluminous messy up-do.

3 sock bun

Tip #1: You can secure the bun with a bobby pin if you are planning a crazy night out, but it is not necessary for an everyday look.

Tip #2: If you are going for a ballerina bun, you can pull the sock away from your head a little at each lap to ensure that the bun is as smooth as possible.

Tip #3: Go classy with a classical low bun, go edgy with a side one, go crazy with a head-top one!

Pretty little bow!!

Let’s introduce you to my (litteraly pretty & little) flatmate Lisa! Everything about Lisa is cute as hell! But let’s go baby-step by baby-step and start with her cuty hair bow!

The first time I saw that trick was on Lady Gaga a few years ago. But let’s face it, her huge bow is easier to wear when you are an excentric rock star than when you are a no life student!

Luckily, no life student can still enjoy the feeling of having damn pretty hair with tinier bows like Lisa’s, in the back or on the side!

Steps are really easy (basically one almost ponytail bobby pined on each side)… But too hard to explain with my loosy english! So here is a pic tutorial to make it clear!

http://blog.hairandmakeupbysteph.com/2012/07/how-to-hair-bow.html

Image